Needle-Felted Penguin
Fre--> Tutorial in inglese trovato su internet. ^^ Si è una piccola cosa, però magari con un pò di fantasia, con l'aiuto delle istruzioni e delle immagini, si possono creare tante altre cosucce. :3
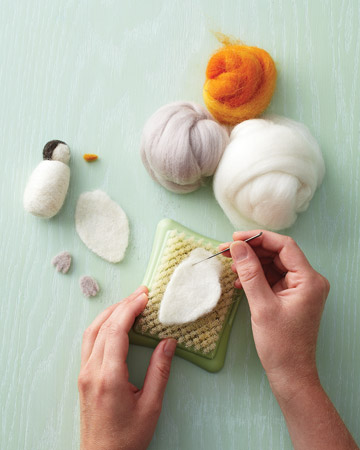
Tools and materials.
•Less than one ounce of white wool roving, plus very small amounts in black, gray, and orange: theyarntree.com.
•Felting needle: colonialneedle.com.
•Needle-felting mat: clover-usa.com.
IntroductionFor your loved ones who have earned a spot on the Nice List this year, a charming gift constitutes the perfect reward. This cute pair -- an incredibly soft penguin and
polar bear -- are made by needle-felting. The technique involves sculpting shapes from unspun wool called roving, by manipulating the fibers with a special needle until they interlock and become dense. An experienced crafter can make one of the creatures in about an hour.
 Step 1 Make body and head
Pull off a large amount of white roving; punch the fibers all over with a felting needle, manipulating the roving with your fingers, as you work, until you have a dense, firm, body-shaped piece (ours is 2 inches long). Repeat with slightly less white roving to make a head-shaped piece.
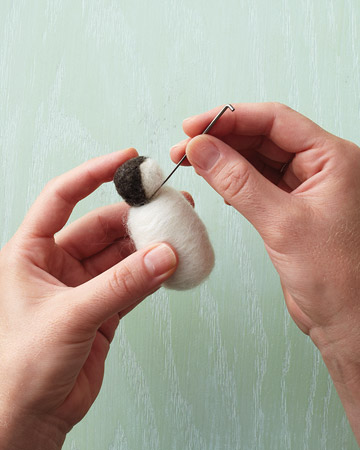
Step 2 Add PlumagePinch off a bit of black roving, and tack it onto the head with the needle. Punch the black fibers into the white with the needle so that the two interlock, manipulating the black roving into the desired shape as you work.
Step 3 Attach Head to BodyNeedle-felt the head to the body, punching the fibers with the needle and using a bit of additional roving to join the two if necessary.
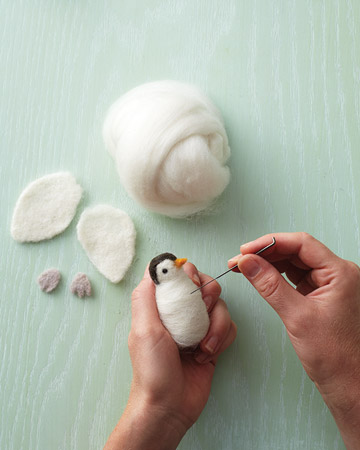
Step 4 Make Beak, Feet, Wings, and EyesTear off a piece of orange roving for the beak, and place it on a needle-felting mat. Punch the fibers all over with the needle, coaxing the roving into a beak shape as you work. Set beak aside. Repeat beak process with gray roving to make 2 feet. Repeat with white roving to make 2 wings. Pinch off 2 small pieces of black roving for the eyes. Tack them to head with needle, pushing lightly. Attach beak in the same way.
Step 5 Add Another LayerA large needle-felted piece may have a pocked surface. To smooth it, needle-felt a thin layer of white roving to the body so it's dense but still soft.
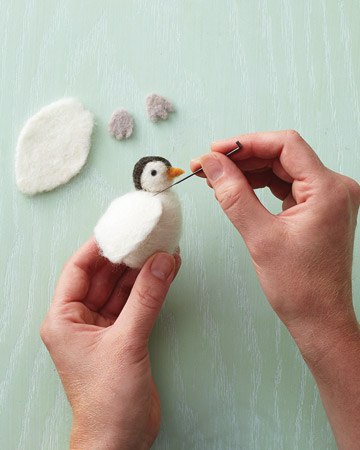
Step 6 Attach Wings and FeetJoin a wing to the body by punching with the needle. Repeat with the second wing, then the feet.
Step 7 Create NeckWrap a bit of gray roving around neck area; punch lightly. Stop before neck feels dense; the added roving should be slightly fluffy.
Step 8 Create a Finished LookAdd a thin layer of gray roving around the body, punching lightly with the needle to baste the roving in place but letting it remain soft and fluffy.
Fonte:
www.marthastewart.com/